Dermaplaning is generally popular skincare procedure that removes dead skin cells and peach fuzz from the skin’s surface using a tiny blade. Although dermaplanes are often conducted by skincare experts in a spa or clinic environment, many individuals are interested in attempting them at home to get smoother, more vibrant skin. With the right tools, technique, and safety measures, dermaplaning at home can be a safe and effective way to make your skin look better and more youthful.
WHY DERMAPLANING AT HOME IS IMPORTANT?
The following are some points about self-dermaplaning.
- Derma planing at home can be a safe and effective way to make your skin look and feel better and reduce the signs of aging.
- best At-home dermaplaning tools might be more convenient and cost-effective than seeing a skincare expert for frequent treatments.
- Derma planing at home may bring a feeling of empowerment and self-care, enabling you to take charge of your look and feel more confident in your skin.
- To perform dermaplane face at home, you will need a derma planing instrument, which normally consists of a tiny, sterile blade linked to a handle.
- Before dermaplaning, washing the skin properly and sterilizing the dermaplaning equipment is essential.
- Use a soft touch to minimize difficulties or adverse effects while dermaplaning your face at home and working slowly and carefully.
- At home dermaplane can give you results immediately, leaving your skin looking smoother, brighter, and more radiant.
DERMAPLANING AT HOME STEPS
The dermaplaning benefits are given below.
1. CLEANSE YOUR FACE
Before starting the dermaplaning procedure, it is essential to properly wash your face to remove any makeup, oil, or grime. Wash your face with a light cleanser and warm water, then pat it dry with a clean towel.
2. PREPARE YOUR SKIN
Apply a small coating of oil or moisturizer to your face to prepare your skin for dermaplaning. It allows the blade to glide more easily over your skin, reducing the chance of discomfort.
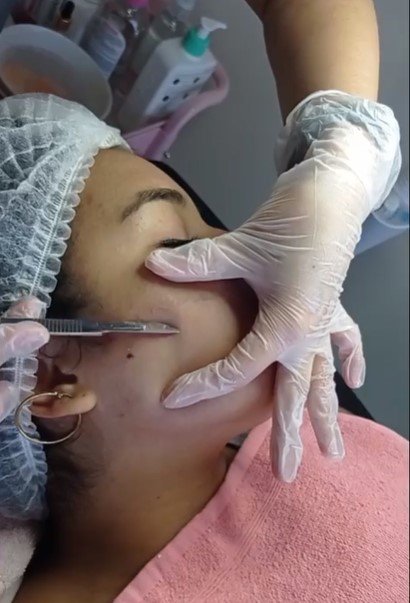
3. BEGIN DERMAPLANING
Hold the dermaplaning tool at a 45-degree angle and scrape the blade over your skin in short, gentle strokes, beginning at the top of your forehead and working your way down to your chin. To minimize irritation, apply gentle pressure and avoid repeatedly going over the same spot.
4. RINSE YOUR FACE
After completing the dermaplaning procedure, rinse your face with lukewarm water to remove excess hair and dead skin cells.
5. APPLY A SOOTHING CREAM
Lastly, put a soothing cream or serum on your face to help calm irritation and speed healing. Look for products that have soothing ingredients like aloe vera, chamomile, or lavender oil.
BENEFITS OF DERMAPLANING AT HOME
There are many benefits to dermaplaning that include.
- Improved Skin Texture: It helps in the removal of dead skin cells and the promotion of cell turnover, resulting in smoother and brighter skin.
- Reduced Wrinkles And Fine Lines: Dermaplaning may minimize the appearance of fine lines and wrinkles by removing the top layer of dead skin cells.
- Better Product Penetration: The skin is better able to absorb and benefit from skincare products after dermaplaning since there are no dead skin cells to obstruct their absorption.
- Removal of Peach Fuzz: It effectively removes peach fuzz or vellus hair from your face, leaving your skin smoother and more luminous
DERMPALANING SIDE EFFECTS
While dermaplaning at home is generally safe, there are some potential side effects to be aware of.
- Irritation: It may cause discomfort or redness, especially if you have sensitive skin or apply too much pressure during the procedure.
- Breakouts: Dermaplaning can cause breakouts or flare-ups, particularly if the skin is oily or acne-prone. Ensure to avoid dermaplaning any spots with active acne or inflamed.
- Sun Sensitivity: The skin may be more sun sensitive after dermaplaning. Use sunscreen and stay out of direct sunshine for at least a day after your procedure.
WHAT TO PUT ON FACE BEFORE DERMAPLANING AT HOME?
To prepare the skin for dermaplaning, applying a thin layer of oil or moisturizer is essential. It allows the blade to glide more easily over your skin, reducing the chance of discomfort.
Employ any moisturizer or oil suitable for your skin type, such as coconut oil, jojoba oil, or a mild face moisturizer. Please avoid using products that include harsh chemicals or exfoliants since they might irritate your skin during the dermaplaning procedure.
IS DERMAPLANING SAFE?
Dermaplaning is a cosmetic procedure that involves exfoliating the top layer of dead skin cells and removing peach fuzz from the face using a sharp instrument. While it is normally safe when done by a professional aesthetician, it might be dangerous to attempt it at home. The technique requires a steady hand and a high degree of competence to prevent hurting the skin or developing infections.
It may cause nicks, scrapes, and abrasions, leading to scars or infection if not done correctly. Typically your skin may be in danger if you attempt the process at home without the necessary knowledge and tools.
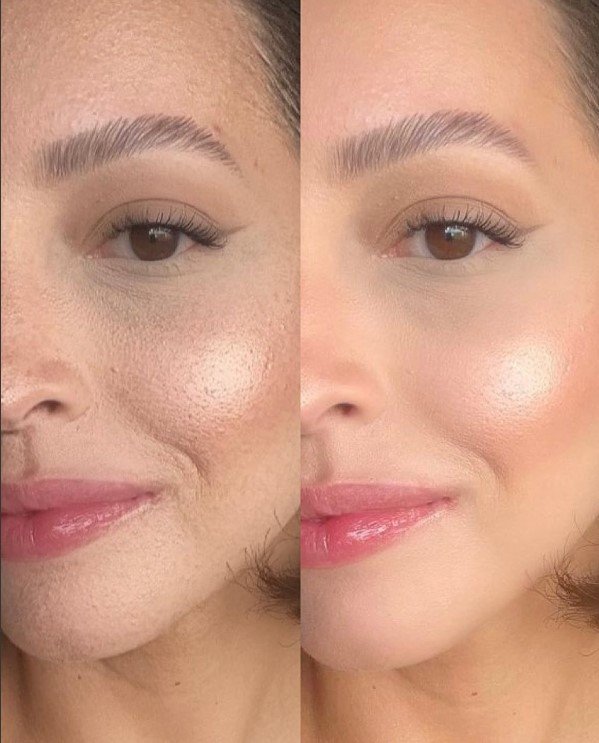
DERMAPLANING AT HOME BEFORE AND AFTER
Before dermaplaning face, the skin may seem dull, rough, or uneven, with fine lines, wrinkles, and other indications of aging readily apparent. Peach fuzz and dead skin cells may also make it harder for skincare products to enter the skin, resulting in less efficacy.
After dermaplaning home, the skin may look smoother, brighter, and more even in tone and texture. The skin may feel smoother and more flexible, and fine lines and wrinkles may be less noticeable. Moreover, since dead skin cells and peach fuzz have been eliminated, skincare products may enter the skin more efficiently, resulting in improved outcomes from your regular skincare process.
DERMAPLANING AT HOME TIPS
Some tips for dermaplanning at home are given below.
- Use a Gentle Touch: Dermaplaning should be done gently, so use a soft touch and avoid exerting too much pressure on your skin.
- Be Patient: It may take some time, so be patient and work gently to ensure you get the finest results possible.
- Take Care Around Sensitive Areas: Avoid dermaplaning on skin regions that are especially sensitive or prone to irritation, such as around the eyes or nose.
- Use a Clean Blade: Always use a clean, sterile blade while dermaplaning to prevent infections or problems.
- Moisturize: Be careful to hydrate your skin after dermaplaning to help reduce inflammation and encourage healing.
MAIN TAKEAWAY- DERMAPLANING AT HOME
Derma-plane at home may be a safe and effective technique to enhance the look of your skin and create a more luminous complexion. By following the correct procedures and avoiding any difficulties and side effects, you may experience the advantages of dermaplaning at home.
FAQS
1. HOW LONG DOES THE DERMAPLANING PROCESS TAKE?
The dermaplaning procedure’s duration varies according to the area of the face being treated and the individual’s skill level. Typically, a complete dermaplaning treatment for the whole face takes between 30 and 45 minutes. But if only the upper lip or chin is being done, the process can be done in just a few minutes.
While doing dermaplaning, taking your time and using suitable procedures to get the greatest results and prevent any mishaps is essential.
2. CAN DERMAPLANING BE DONE ON ALL SKIN TYPES?
Dermaplaning sessions may be done on most skin types. It’s important to understand that treatment isn’t for everyone. Dermaplaning may cause redness, irritation, or inflammation in those with very sensitive or reactive skin. People suffering from active acne or skin diseases such as eczema or rosacea may also be ineligible for dermaplaning.
3. WHAT SHOULD I DO AFTER DERMAPLANING AT HOME?
- After derma plane, wait at least 24 to 48 hours before swimming or utilizing hot tubs or saunas.
- To enable your skin to recover, avoid wearing makeup for at least 24 hours following the treatment.
- Drink lots of water to keep your skin hydrated and encourage healing.
- Avoid touching your face for at least a few hours after consider dermaplaning to avoid introducing bacteria to your skin.
- Avoid using harsh exfoliants or scrubs on your face for a few days.
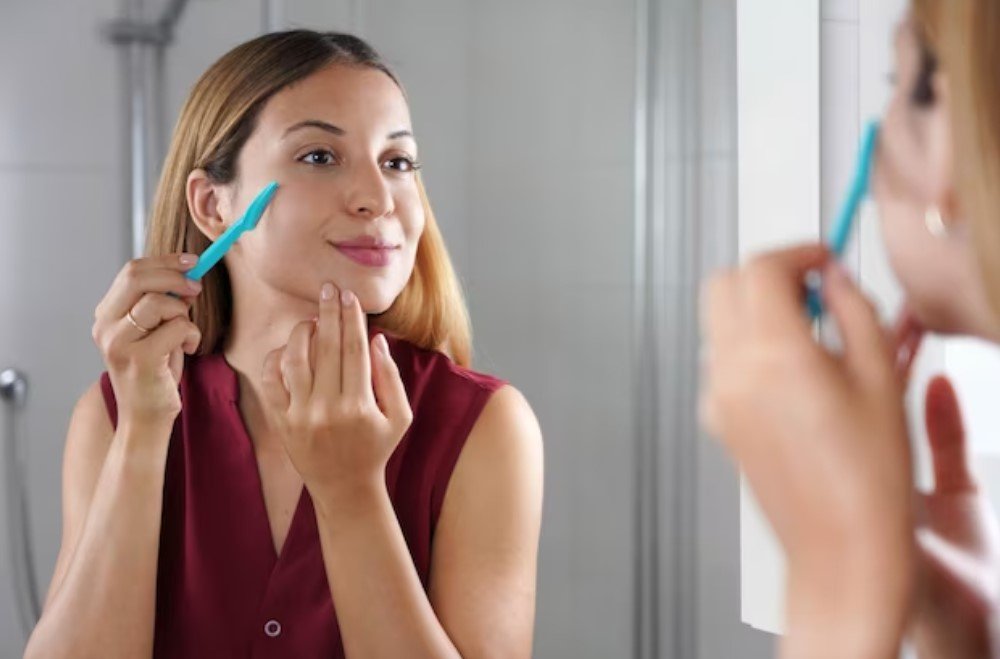
WHAT EQUIPMENT DO I NEED TO DERMAPLANE AT HOME?
Here are some tools to dermaplane at home.
- Dermaplaning tool
- Cleanser
- Towel
- Mirror
- Moisturizer